Skins (156)
Visuals (115)
Input Plugins (34)
Output Plugins (6)
General Plugins (14)
Archive Readers (15)
Input Plugins (41)
DSP Plugins (10)
External Add-ons (16)
XMPlay Archive (71)
Skins (156)
Visuals (115)
Input Plugins (34)
Output Plugins (6)
General Plugins (14)
Archive Readers (15)
Input Plugins (41)
DSP Plugins (10)
External Add-ons (16)
XMPlay Archive (71)
The Info Window contains various other panels with track information, an extended playlist and an audio file library. Usually, the header of the window looks like this:
![]()
On the left is a Close button. The second button is Auto-resize, which will make the Info Window adapt its size to the contents it's displaying (on the Appearance page of Options and stuff as well). The third button, Track info, switches between the two modes of the Info Windw: track info and playlist/library. Left-click this button to go to the Extended Playlist, right-click it to go directly to the Library. The rest of the tabs are explained below.
General
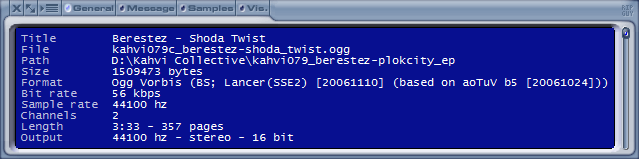
The first tab of the track info, the General tab, contains information about the file and the format. It'll display the formatted title, properties of the audio file and the Output format used. If a module file is trimmed, this will be noted in the the Length field. If the current file is resampled or downmixed to match the settings of the output device, the Output field will show the file's original sample rate and channel count between brackets. Right-click anywhere on the text to open the context menu, where you can Copy the text to the clipboard or open the Plugin file info window, if the current track is played via a Winamp input plugin.
Message
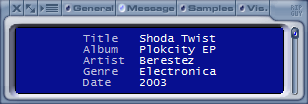
The second tab is the Message tab, which shows the tags found in the current file. If an audio file comes with a CUE-sheet (either in a tag or in a separate CUE file with the same filename), the subtracks from the CUE-sheet will be shown here. On online radio stream with title updates, the current title will be shown separately. If you have overridden the tags via the Track Info Window, the original tags may be shown as well, depending on your settings (see the Library page of Options and stuff). Again, right-click to get options to Copy the text to the clipboard or open the Plugin file info window. In addition, the context menu will display any weblinks found in the tags, click them to have your default browser navigate to that address.
Samples
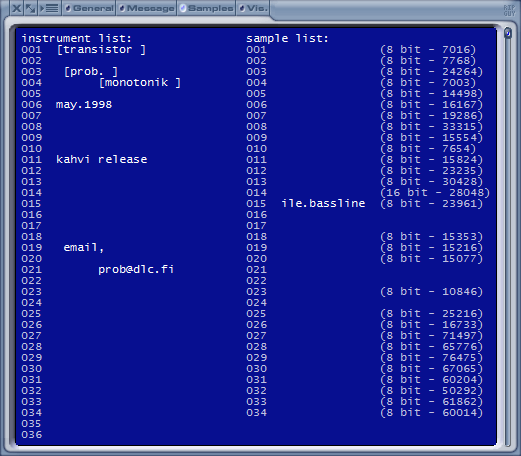
For module files, the Samples tab will show the instruments used and the samples present in the file, their names, their resolution and their size (in bytes). The names of the instruments and samples often contain information about the track. Right-click the text to open the context menu, to Copy the text to the clipboard or open the Plugin file info window.
The Visualizations tab isn't really track-related, but it's here for historical reasons. Get more visualizations from the Support Site.
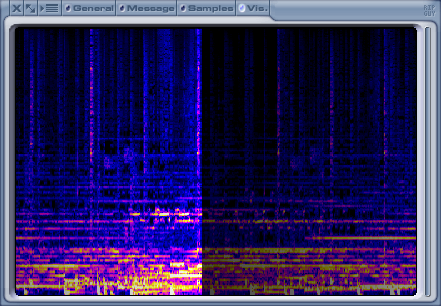
XMPlay has three built-in visualizations: Spectrum, Spectrum (3D) (shown in the image above) and the MOD Pattern Display (only works for modules). If you have installed xmp-midi, a MIDI lyrics/karaoke visualization will be available as well (only works for MIDI files, obviously). Additional visualizations should be Sonique SVP files. Place the visualization files in the Visualizations folder (see Installing XMPlay).
Select a visualization by right-clicking on the current visualization, so a context menu listing all loaded visualizations will appear. Double-clicking will make the visualization switch to fullscreen mode (note that XMPlay will prevent your screensaver from activating in this case). If a visualization allows for user interaction, use the middle mouse button to navigate through the visualizations menu. The visualizations are completely rendered by the CPU, so it can take quite some CPU power if you let it run at full resolution. You can limit the rendering resolution on the Miscellaneous page of Options and stuff.
The settings for each visualization are stored in vis.ini, in the same folder as xmplay.exe. This file is separated in several sections, each headed by the name of the visualization they apply to. The available settings vary per visualization and are often poorly documented. You can change these setting with a text editor like Notepad.
Note that xmp-wavis allows you to use Winamp visualizations, albeit in a separate window.
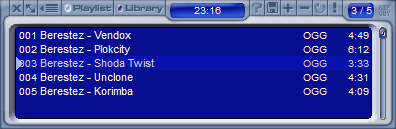
The Extended Playlist has the same function as the Playlist Panel, but the Extended Playlist is a separate, resizable window. Note that the header of the Info Window has changed, click the Track info button (third from the left) to go back to the Track info part. The Playlist and Library buttons allow you to navigate to the Playlist or Library tab. To the right of those is a timefield, which shows the total time of the tracks, alternated with the playtime of the selected tracks (if you've selected multiple tracks).
Next to the timefield are the playlist manipulation buttons as on the Playlist panel, with the addition of the Find track(s) button (the !). Left-clicking this button opens the Find window, right-clicking it will give you the options to Select all matching entries, Skip playback of non-matching entries or to Clear the Find text. On the far right is another field, which displays the number of the current track and the total number of tracks in the playlist. The rest of the Extended Playlist behaves the same as the Playlist Panel, so you can move tracks around, drop new tracks or folders on it, or use the track context menu to modify tracks. Note that the Display columns settings are configured separately from the Playlist Panel.
The playlist will keep all the tracks to be played, but XMPlay also has the ability to index all your music in its Library. To play files, you have to add them to the playlist first.
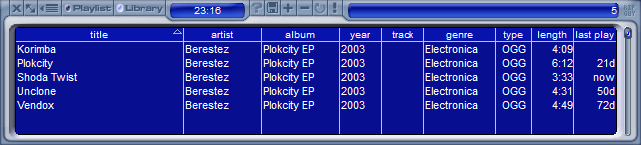
You can add tracks to the library by choosing Add to library from the Track context menu, by dropping them on the library, by using the Add file button at the top of the Library tab of the Info Window, or by using monitored directories. XMPlay doesn't do anything to the files themselves when you add them to the library, it just reads and saves all tag information. Click the Save button to export all entries of the library into a playlist file.
The information about the entries are shown in different colums. Left-click a column header to sort the tracks using that column. You can sort by multiple fields by left-clicking the column headers in reverse sorting order. For example, click track, then album and then artist to sort by artist, then by album and finally by track. Right-click a column header to select which columns to show.
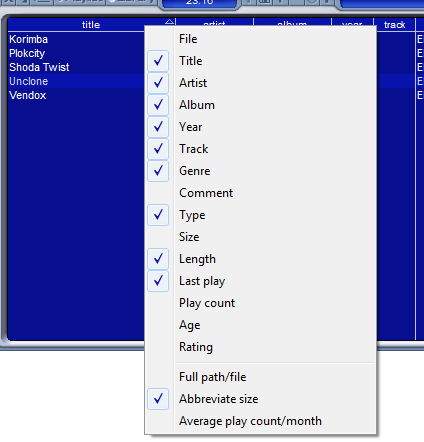
The File column shows the filename, or the full path and filename if you tick Full path/file. The Size column shows the file size in bytes, or in something more easily readable if you tick Abbreviate filesize. The Play count column shows the total number of times you've played a track, or the number of times you've played a track divided by the number of months the track is in the library if you tick Average play count/month.
The field on the top right usually shows the total number of tracks in the library, but it'll also show the search terms and the number of hits if you've used Find.
![]()
The Track context menu is mainly the same as the one in the playlist, but there are some small differences.
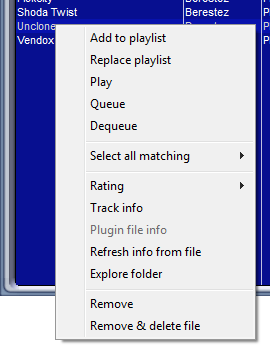
Add to playlist will add the currently selected file(s) to the bottom of the playlist, while Replace playlist will clear the current playlist and put the selected tracks into it. Play will select the file in the playlist (or add it if it's not there yet) and play it directly. If you've selected multiple files, XMPlay will add all of them and start playing the first one. Queue selects or adds the file as well, but adds it to the queue rather than playing it. Dequeue removes the file from the queue, or does nothing if the file is not in the queue. Select all matching allows you to extend the current selection based on track information; you can choose from Title, Artist, Album, Year, Track, Genre, Comment, Type and Folder.
Finally, Track info allows you to view and override tags for all selected files.
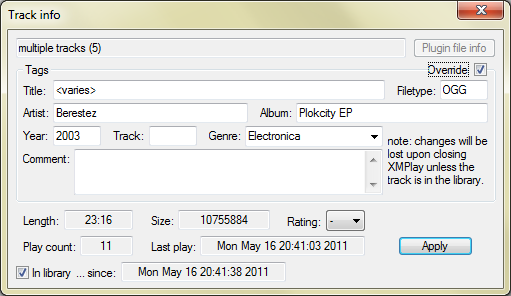
The changes you make here are applied to all entries currently selected, which allows for mass-adjusting of the tags.