Skins (156)
Visuals (115)
Input Plug-ins (34)
Output Plug-ins (6)
General Plug-ins (14)
Archive Reader (15)
Input Plug-ins (41)
DSP Plug-ins (10)
External Add-ons (16)
XMPlay Archive (70)
Skins (156)
Visuals (115)
Input Plug-ins (34)
Output Plug-ins (6)
General Plug-ins (14)
Archive Reader (15)
Input Plug-ins (41)
DSP Plug-ins (10)
External Add-ons (16)
XMPlay Archive (70)
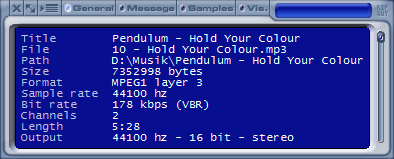
The Info window provides access to a bigger, resizable playlist, detailed track information, the media library, visualisations and more.
You can resize the window by dragging one of it's edges with the mouse. The Window also offers a mode to auto-resize itself to fit the contents (![]() ).
).
![]() This switch toggles between displaying the Information Section and the Extended Playlist.
The Information Section displays information on the currently loaded track, while the Extended Playlist is a large and more flexible version of the one available in the Playlist Panel.
This switch toggles between displaying the Information Section and the Extended Playlist.
The Information Section displays information on the currently loaded track, while the Extended Playlist is a large and more flexible version of the one available in the Playlist Panel.
Tip: The Information Window can also be open even while XMPlay is minimized to the System Tray.
Displays info on the file's name, format, size, length, etc...
Displays any messages or tags contained in the file, including the current track name when streaming from Shoutcast servers. Also displays single tracks from a CUE sheet, if one was found for the current track. See CUE Sheet Usage for more information.
Tip: Right-clicking gives the option to copy the window's text to the clipboard, and also launch any URL's available.
Displays instrument and sample texts (MOD formats only).
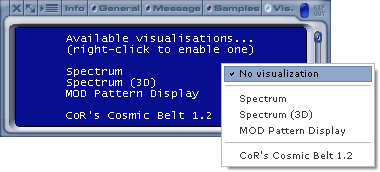
Displays visualisation plugins.
The Visuals Panel displays the currently available visual plugins, including the in-built Pattern and Spectrum Display's.
Once a Sonique visual plugin is installed, it will be listed here and may be selected by clicking the right mouse button within the Panel area or rolling up or down using the mouse scroll wheel.
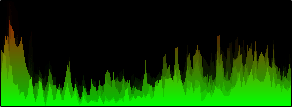
A spectrum analyser will give you a graphical representation of a certain frequency range.
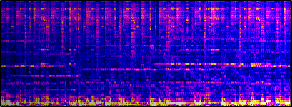
A 3D spectrum analyser will give you a graphical representation of a certain frequency range at a certain time and magnitude. This is shown by providing the time (horizontally), frequency (vertically), and magnitude (colour) of sound.
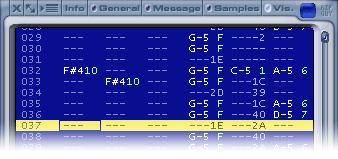
The "MOD Pattern Display" visualisation applies to MOD formats only, and allows you to get an idea of how the files were "tracked". For simplicity and clarity, not all effects are shown and a universal notation is used for all formats.
When all the channels do not fit in the display, the 4 & 6 (numpad) keys can be used to scroll the display. The selected channel can also be muted using the 5 (numpad) key.
XMPlay can use 2 alternate scrolling methods, which are changed by clicking on the Pattern Display with the middle mouse button, or via the "S" shortcut key.
The following entries are shown by XMPlay:
Tip: This section only displays the features that are not contained in The Playlist Panel, for details about the basic playlist functions see the Playlist Panel section.
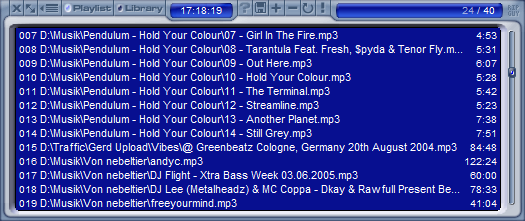
This button switches the playlist over to display the Library.
Find tracks containing a specified substring in their title or filename. Right-clicking allows you to choose to have only the matched tracks played (the rest will be skipped).
For details of how the this function works, see the Find Tracks section of the Options and stuff window.
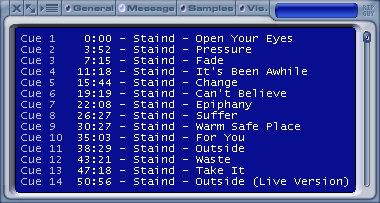
CUE files can be used to quickly jump to specific points (eg. start of a song in an album) in large files. When opening a track, XMPlay will look for a CUE file of the same filename (with ".CUE" extension) in the same directory or archive.
If one is found, it'll be loaded and the CUEs will be listed in the "Message" info window.
Tip: Right-clicking on the next and previous buttons will navigate through the CUE sheet.
For example the following files in an archive or directory would enable XMPlay to use a CUE sheet:
Staind - Break the cycle.flac
Staind - Break the cycle.cue
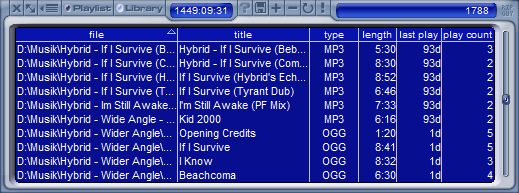
The library is a sort of glorified playlist. Whereas the playlist just contains each track's filename and title, the library contains a lot of additional information.
Files can be added to the library in the same way as they can with the playlist, eg. using the add button or by drag'n'dropping them. They can also be added automatically when played or added to the playlist. See the "Playlist" options.
Right-clicking on a track will give options to play the track, add it to the playlist, view/edit track info, refresh the info, and remove the track. Double-clicking will also play the track, and middle-clicking will queue the track.
Tip: When playing or queuing a track from the library, it'll first be added to the playlist if it's not already in there.
The full list of info contained in the library is: filename, title, artist, album, year, track, genre, comment, file type, file size, length, the time of last playback and the play count.
Each of which can be hidden or shown by right-clicking on a column heading.
You can also change the display order of the columns by dragging them, and you can change the width of each column by dragging the borders.
The tracks in the library can be sorted by any of these values, making it quick and easy to locate the tracks you want to play. Click on the column heading to sort by that value. Clicking again will reverse the order.