Skins (156)
Visuals (115)
Input Plugins (34)
Output Plugins (6)
General Plugins (14)
Archive Readers (15)
Input Plugins (41)
DSP Plugins (10)
External Add-ons (16)
XMPlay Archive (71)
Skins (156)
Visuals (115)
Input Plugins (34)
Output Plugins (6)
General Plugins (14)
Archive Readers (15)
Input Plugins (41)
DSP Plugins (10)
External Add-ons (16)
XMPlay Archive (71)
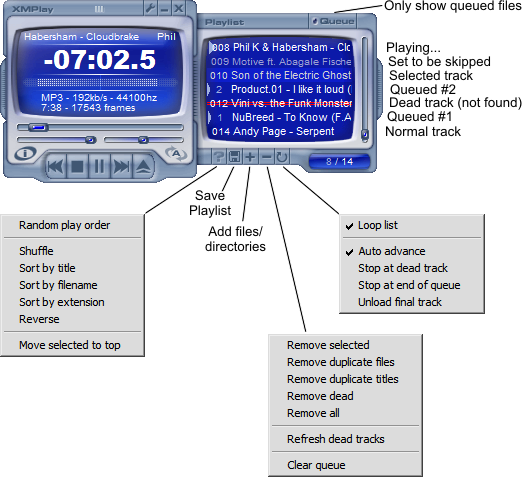
Besides the obvious functionality of playing a list of files, the XMPlay playlist has some other neat features, like the Queue and "Dragon Droppings", which will be explained later. First, let's look at the basic functionality.
Select a track by clicking on it.
Doubleclicking plays a track.
Hold Ctrl to select multiple files at once.
Hold Shift to select ranges of files, just as in Windows Explorer.
Use Ctrl+Shift to select multiple ranges of files.
You can drag files around the playlist to change their playing order.
Tip: "Dead" tracks will be marked with a double red line. Merely unplayable files will only be marked with a single red line.
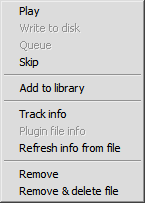
The context menu of any file will give you a list of options:
Dropping files on the main window will make them replace the current playlist and begin playing immediately.
Dropping files inside the playlist will insert the files above the track that you dopped the files upon.
Dropping files on the "Add tracks" button will add the files at the bottom of the playlist.
XMPlay supports the reverse of "Drag and Drop": dragging a file out of the playlist and into other applications that accept Drag and Drop actions.
To do this, select one or more tracks on the playlist, begin dragging with the left mouse button and then press the right mouse button. The cursor will now indicate valid targets for external Drag and Drop operations.
If you drop files in file managers, XMPlay will copy them there. If you drop files on other applications, e.g. for opening files, XMPlay just passes a reference to the actual file to the other application.
This works from both the playlist panel as well as the "big" Playlist.
You can enable/disable random playing here. Right-clicking gives you more options:
Tip: only tracks that are currently selected will be sorted.
Saves the playlist as Unicode .pls file.
Left-clicking the plus button opens a dialog where you can select one or more files to be added to the playlist.
Right-clicking the plus button opens another dialog, where you can add whole directories and subdirectories at once.
Tip: drag'n drop files or directories here to add them to the bottom of the playlist rather than inserting them inbetween.
Left-clicking the minus button removes the selected tracks from the list.
Right-clicking the minus button gives you these options:
Tip: use "Refresh dead tracks" to revive tracks that were not found because they reside on removable media, like a USB harddrive.
Left-clicking toggles list looping. This option does not influence the track looping option. When list looping is active, playback will begin on the first track after the last track has played.
Right-clicking the button gives you these options:
The small display on the bottom right can be switched between two modes:
Time mode - This shows the total playlist duration in hours, minutes and seconds. If you have tracks selected, the display will flash between the total duration and the duration of the selected tracks.
Tip: The alternating flashing between the times can be disabled by adding the line "NoFlashTotal = 1" to the xmplay.ini. See "Secret INI options" for more options.
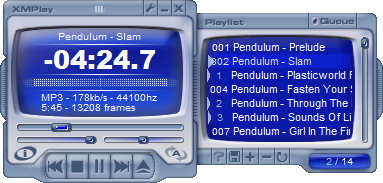
Track count - shows the currently playing track and the total number of tracks on the playlist.
If you want the playlist to leave out a certain track while playing, you can mark the track to be skipped via the context menu item "skip" or by pressing the default shortcut "Space". Un-skipping works the same.
Queueing tracks allows files to be played in a different order than the playlist dictates. Just click the tracks with the middle mouse button in the order you want them to be played. (Note: The currently playing song can't be queued.)
Alternatively, you can right-click one or more files and select "Queue".
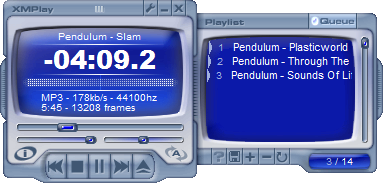
If you press the "Queue" button on the upper right of the playlist panel, the playlist will show queued tracks ONLY.