Skins (156)
Visuals (115)
Input Plugins (34)
Output Plugins (6)
General Plugins (14)
Archive Readers (15)
Input Plugins (41)
DSP Plugins (10)
External Add-ons (16)
XMPlay Archive (71)
Skins (156)
Visuals (115)
Input Plugins (34)
Output Plugins (6)
General Plugins (14)
Archive Readers (15)
Input Plugins (41)
DSP Plugins (10)
External Add-ons (16)
XMPlay Archive (71)
This page provides some insight into some common tricks that you will see used in many XMPlay skins, either making them more useful or just look neat.
If you have a nice idea that you think would be great for this page send it to XMPlay Support.
Tip: If its nicely written out it will get on here a whole lot faster.
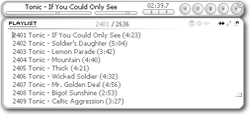
In this example we'll lock the playlist panel in place so as to make it a permanent feature of the main panel.
Firstly we open up panel_main.bmp, and note down the width of it.
Your playlist panel should be the same width as the main panel.
Although it doesn't have to be, it makes this much easier.
Now open your skinconfig.txt and edit the pos_right setting.
This setting has two numbers, the first must be the same as the width of your main panel and the second number should be 0.
E.g. pos_right = 100 0
Tip: Locking the left panel, or "options panel", is done the same way.
Save your changes to the skinconfig.txt and thats it.
Tip: When locking panels like this its a good idea to use the 255 mask on the playlist panel.
This makes it an extension of the main panel for moving XMPlay via the mouse.
In this example we'll make it so the left panel, or "options panel", slides out of the right side of XMPlay instead of the left.
Firstly we open up panel_main.bmp, and note down the width of it.
Your options panel should be at least double the width of the main panel if not more.
Now open your skinconfig.txt and edit the pos_right setting.
This setting has two numbers, the first must be the same as the width of your main panel. The second number shows how many pixels the panel will slide out, so change this as required (May take some trial and error).
E.g. pos_right = 100 50
Tip: Reversing the playlist panel is done the same way.
Save your changes to the skinconfig.txt and that's it.
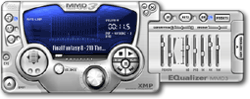
This is a particularly hard trick to use, but looks great if you can pull it off.
Best way to show what it is, if for you to download the MMD3 skin and try it out. You'll notice when you enable or disable/enable any of the main panels options, although only the button itself is highlighted many areas are effected by the change.
Here we'll try to explain how that works.
Before you do anything there is one catch to using this. The button and the area it changes cannot overlap any other object mask area.
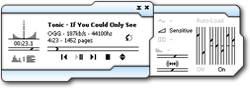
Here we'll show excerpts from 4 Bitmaps that come together to create this effect.
This is the button_loop.bmp

As you can see it is alot bigger than a normal button bmp as you also need to have the graphics for all the other areas you will change.
This is the mask_main.bmp

Here you can see the area we will click on, also there are two pixels off to the right marking out a rectangle to match the button_loop.bmp size. This will cause this whole area to change with the states of the button.
This is the panel_main.bmp
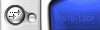
This is pretty normal, the only difference is the two transparent pixels to match those in the mask. This is to stop them from highlighting with the normal button area.
But does'nt that mean there is two transparant pixels in the middle of the skin?!
Yes, thats why the playlist panel is fixed in place underneath to fill in the blanks.
Like so: panel_list.bmp

And so you can see the playlist panel carries duplicate graphics to cover this up.
Tip: It's a good idea to have a 5 pixel buffer around the blank spot in the playlist panel, this stops the hole showing when the player is being moved.
And thats all there is to it, unfortunately there is no sample bitmaps for this at the moment.