Skins (156)
Visuals (115)
Input Plugins (34)
Output Plugins (6)
General Plugins (14)
Archive Readers (15)
Input Plugins (41)
DSP Plugins (10)
External Add-ons (16)
XMPlay Archive (71)
Skins (156)
Visuals (115)
Input Plugins (34)
Output Plugins (6)
General Plugins (14)
Archive Readers (15)
Input Plugins (41)
DSP Plugins (10)
External Add-ons (16)
XMPlay Archive (71)
Illustrated Manual - Icecast streaming
This page covers the very basic setup of a shoutcast server and DSP audio stream.
MaxUser
Password
Tip: PortBase=8000 - if you're behind a firewall, you'll need to open this port.
Install and set up the SHOUTcast DSP plugin.
Tip: You can get more information about installing DSP plugins here and here about setting them up for use.
Edit the DSP Output tab to match the new password you made before.
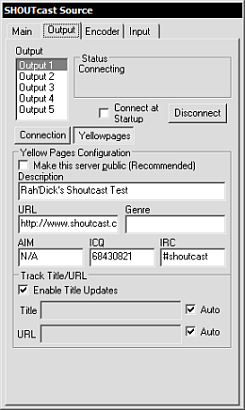
Also go to the yellowpages part of this tab and untick the Make this server public checkbox.
Warning: There is a bug with this DSP: you may only edit it's options while you have XMPlay's Options open.
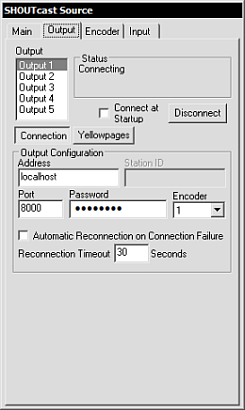
If the Shoutcast server isn't already running, start it.
Now press the Connect button to make the DSP connect to the server.
You're now broadcasting whatever you play in XMPlay.
You can also modify the quality of the broadcast in the Encoder tab of the Shoutcast DSP plugin.
To connect to your broadcast, simply use the URL: http://youripaddress:8000/.
Example: http://127.0.0.1:8000/
You can find out your external IP easily by visiting WhatIsMyIP.com.