Skins (156)
Visuals (115)
Input Plugins (34)
Output Plugins (6)
General Plugins (14)
Archive Readers (15)
Input Plugins (41)
DSP Plugins (10)
External Add-ons (16)
XMPlay Archive (71)
Skins (156)
Visuals (115)
Input Plugins (34)
Output Plugins (6)
General Plugins (14)
Archive Readers (15)
Input Plugins (41)
DSP Plugins (10)
External Add-ons (16)
XMPlay Archive (71)
The response speed to all these options is dependant on the buffer size, the delay will be the length of the buffer chosen in the device setup.
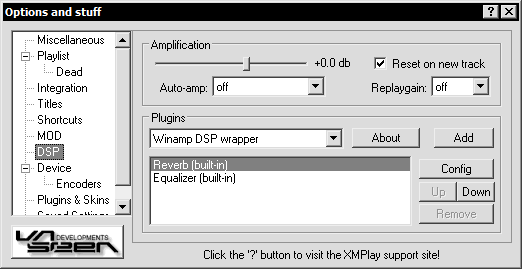
The bottom part of the window is dedicated to DSP plugins. The "up" and "down" buttons can be used to change the order in which the DSP are applied. This DSP list also allows for multiple DSPs to be active at once, in whatever order the user chooses. There are 2 built in DSPs - the equalizer and reverb. Most Winamp DSP plugins can be used via the "Winamp DSP wrapper". You can create your own plugins by using the SDK available from the XMPlay website.
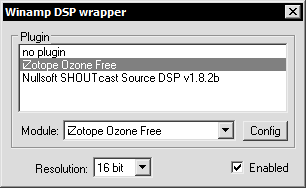
Once a DSP plugin has been installed it then has to be setup within XMPlay. In this example we will be setting up the iZotope Ozone DSP.
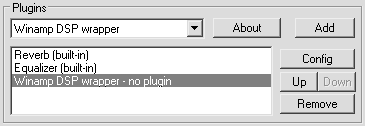
Once installation is complete, start XMPlay and proceed to the Options dialog. Under the DSP option you will find the Winamp DSP wrapper listed, press Add and double click the new "Winamp DSP wrapper - no plugin" entry.
The DSP wrapper's config will appear, once the iZotope Ozone plugin is selected Ozone's Dialog will appear, and may be enabled to process audio via the check box in the same dialog.
Tip: Most DSP plugins need the Resolution left at 16 bit. It is also recommended that you are not playing music during the DSP setup.